
Deploy Machine Learning Model using Python Flask | Machine Learning Project Tutorial
- Hackers Realm
- Jul 19, 2022
- 3 min read

Updated: May 30, 2023
Discover the art of deploying machine learning models with Python Flask! This comprehensive tutorial takes you through the process of building, packaging, and deploying a machine learning project. Learn to create a RESTful API, handle model predictions, and provide real-time insights. Enhance your skills in model deployment and bring your machine learning projects to life. #DeployMLModel #PythonFlask #MachineLearning
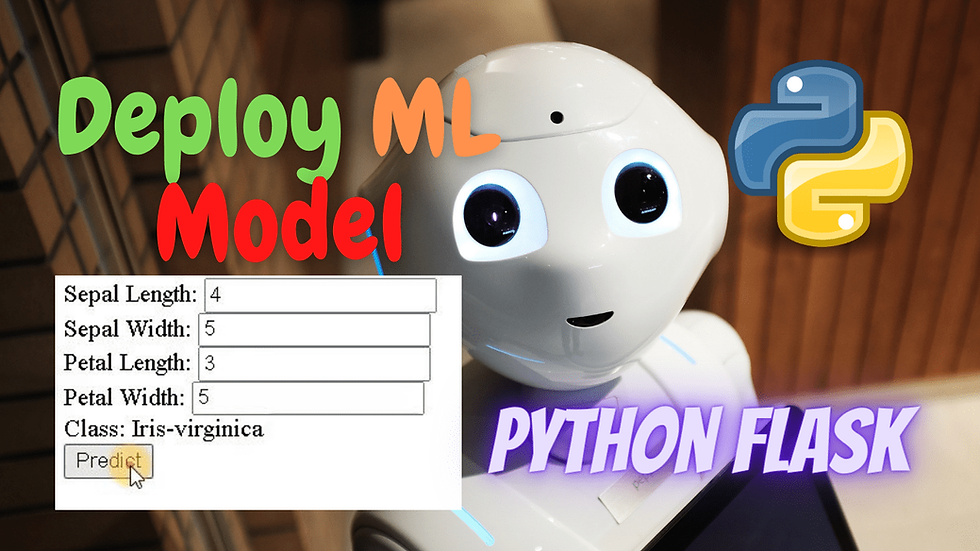
In this project tutorial we will implement Python Flask on a trained model using the Iris Dataset Project which we already trained and processed.
If you haven't seen the Iris Dataset Project you may view the article and tutorial video here
You can watch the video based tutorial with step by step explanation down below
First we must save the trained model in order to implement Python Flask
# save the model
import pickle
filename = 'savedmodel.sav'
pickle.dump(model, open(filename, 'wb'))
Pickle is used to save the model
Pickle is a module for data type and file manipulation
x_test.head()
Display of the dataset
Next we load the model
load_model = pickle.load(open(filename,'rb'))Now we can predict data from the model
load_model.predict([[6.0, 2.2, 4.0, 1.0]])array(['Iris-versicolor'], dtype=object)
Originally the model was label encoded, where the array value would be from zero to two as processed in the label encoder section
Training the data without label encoder will return the actual label name
After applying all the necessary configuration we proceed to the backend deploy.py to implement Flask
from flask import Flask, render_template, request
import pickle
Necessary import to use Flask for this project
Pickle is also imported to load the model
First we initialize Flask and load the model for processing
app = Flask(__name__)
# load the model
model = pickle.load(open('savedmodel.sav', 'rb'))
Next we display the home page and create a function
@app.route('/')
def home():
    result = ''
    return render_template('index.html', **locals())
Defined function will return the index of the current home page that we want to load
Later we define another function to predict the data
@app.route('/predict', methods=['POST', 'GET'])
def predict():
    sepal_length = float(request.form['sepal_length'])
    sepal_width = float(request.form['sepal_width'])
    petal_length = float(request.form['petal_length'])
    petal_width = float(request.form['petal_width'])
    result = model.predict([[sepal_length, sepal_width, petal_length, petal_width]])[0]
    return render_template('index.html', **locals())
This function will request the user data from the webpage and predict the label from the loaded model and return to the webpage
if __name__ == '__main__':
    app.run(debug=True)
Main function of the program, if any error occurs it will appear in the terminal.
Now we must define "index.html" to get user input and display the results
<html>
<body>
<form action='/predict' method="POST">
Sepal Length: <input type='text' name='sepal_length'><br>
Sepal Width: <input type='text' name='sepal_width'><br>
Petal Length: <input type='text' name='petal_length'><br>
Petal Width: <input type='text' name='petal_width'><br>
Class: {{result}} <br>
<input type='submit' value='Predict'>
</form>
</body>
</html>
Place the index.html file in templates folder to avoid any issues
This is the HTML body structure for this project to input data in the forms and predict the result from the model
You may structure your page(s) however you want, this is a simple view in a single page
You must organize the display of the results with same order as how they are ordered in the model to avoid input errors

Display of the web page that we defined
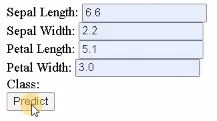
You input the corresponding values in the box to predict a sample
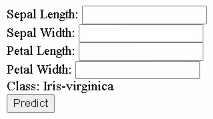
After clicking the predict box it displays the output class
You may design a separate web page to view the output
Final Thoughts
You may create multiple HTML pages or JavaScript files to display the results
You can implement Flask on cloud platforms to deploy your trained model
In this project tutorial, we have explored how to deploy a machine learning model using Python Flask framework to display the results from a trained model.
Get the project notebook from here Thanks for reading the article!!! Check out more project videos from the YouTube channel Hackers Realm


Comments