
Realtime Human Pose Estimation using Python | OpenCV - Mediapipe | Deep Learning Tutorial
- Hackers Realm
- Jul 1, 2022
- 3 min read

Updated: May 31, 2023
Embark on a journey into the world of human pose estimation with Python! This comprehensive tutorial explores realtime pose estimation using OpenCV, Mediapipe, and deep learning. Learn to detect and track human poses in videos or webcam streams, unlocking the potential for applications in sports, healthcare, and more. Enhance your skills in computer vision and dive into the realm of deep learning. Unleash the power of human pose estimation with this hands-on tutorial. #HumanPoseEstimation #Python #OpenCV #Mediapipe #DeepLearning #ComputerVision
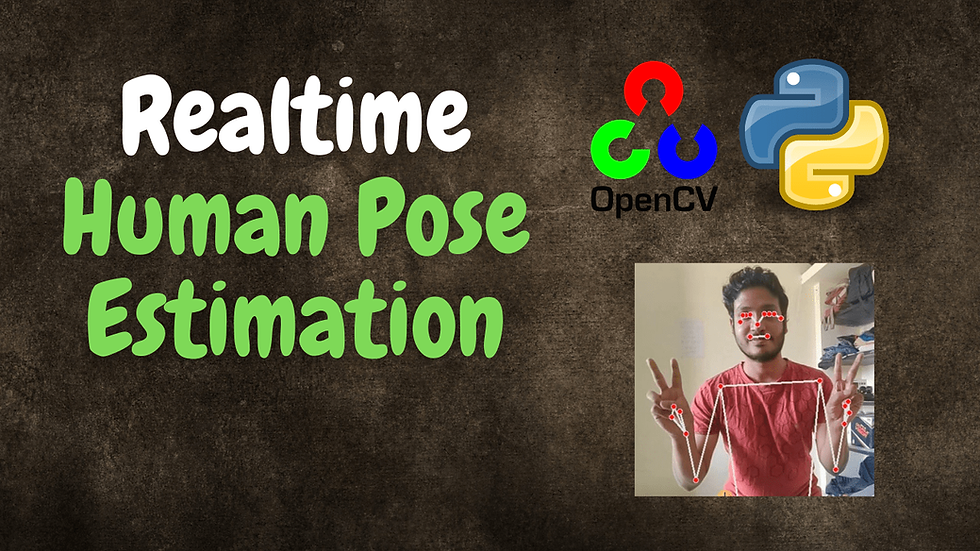
In this project tutorial we are going to identify and track all parts and movement of human poses from a recorded video or realtime recording using Mediapipe and OpenCV.
You can watch the step by step explanation video tutorial down below
Project Information
The objective of the project is estimate human body pose in realtime. Mediapipe module is used to detect and track the body movements. It can work for both recorded video and in realtime. It can capture 33 points in the human body and can run smoothly in realtime with the help of tracking.
Install Modules
Let us install the OpenCV module and Mediapipe module.
!pip install opencv-python
!pip install mediapipe
Import Modules
import cv2
import mediapipe as mp
## initialize pose estimator
mp_drawing = mp.solutions.drawing_utils
mp_pose = mp.solutions.pose
pose = mp_pose.Pose(min_detection_confidence=0.5, min_tracking_confidence=0.5)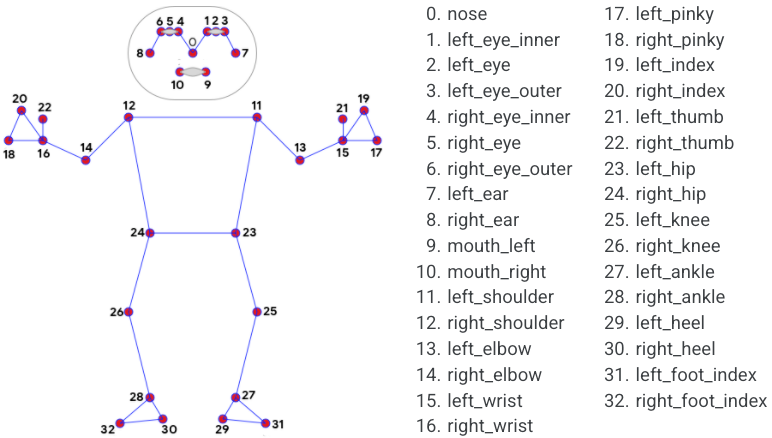
Initialization of the pose estimator
min_detection_confidence=0.5 - Min. threshold for the pose drawing
min_tracking_confidence=0.5 - Min. tracking detection to minimize overall performance
Very helpful baseline for other projects
Pose Estimation for Video
cap = cv2.VideoCapture('test_video.mp4')
while cap.isOpened():
    # read frame
    _, frame = cap.read()
    try:
         # resize the frame for portrait video
         frame = cv2.resize(frame, (350, 600))
         # convert to RGB
         frame_rgb = cv2.cvtColor(frame, cv2.COLOR_BGR2RGB)

         # process the frame for pose detection
         pose_results = pose.process(frame_rgb)
         # print(pose_results.pose_landmarks)

         # draw skeleton on the frame
         mp_drawing.draw_landmarks(frame, pose_results.pose_landmarks, mp_pose.POSE_CONNECTIONS)
         # display the frame
         cv2.imshow('Output', frame)
    except:
         break

     if cv2.waitKey(1) == ord('q'):
          break

cap.release()
cv2.destroyAllWindows()
Demonstration of how the Human Pose estimation works
frame = cap.read() - Capture each frame for processing
frame = cv2.resize(frame, (350, 600)) - Resized to portrait size to cover the whole body in this particular video.
frame_rgb = cv2.cvtColor(frame, cv2.COLOR_BGR2RGB) - Convert each frame from BGR to RGB
pose_results = pose.process(frame_rgb) - Process each frame and points out every pose landmark
mp_drawing.draw_landmarks(frame, pose_results.pose_landmarks, mp_pose.POSE_CONNECTIONS) - Draws and connects every point landmark by the pose estimator initialized before
cap.release() - Releases the captured object
cv2.destroyAllWindows() - Closes all the windows are opened
You can clearly see how certain parts are marked very well
Video had been converted and resized for better display
# get landmark for a specific point
pose_results.pose_landmarks.landmark[32]
x: 0.35414522886276245 y: 0.8367241024971008 z: 0.16406674683094025 visibility: 0.9696751236915588
Landmark of a specific point detected from the video
Realtime Pose Estimation
cap = cv2.VideoCapture(0)
while cap.isOpened():
    # read frame
    _, frame = cap.read()
    try:
         # resize the frame for portrait video
         # frame = cv2.resize(frame, (350, 600))
         # convert to RGB
         frame_rgb = cv2.cvtColor(frame, cv2.COLOR_BGR2RGB)

         # process the frame for pose detection
         pose_results = pose.process(frame_rgb)
         # print(pose_results.pose_landmarks)

         # draw skeleton on the frame
         mp_drawing.draw_landmarks(frame, pose_results.pose_landmarks, mp_pose.POSE_CONNECTIONS)
         # display the frame
         cv2.imshow('Output', frame)
    except:
         break

     if cv2.waitKey(1) == ord('q'):
          break

cap.release()
cv2.destroyAllWindows()
In real-time when certain body parts are included in the frame it marks the pose and tracks the movement.
cv2.VideoCapture(0) - Zero is the default webcam, if you have multiple webcams change the value in the parameter.
Final Thoughts
Very good baseline for other movement detection projects like movement sensors or skeleton movement recording for animation projects.
Adjusting the tracking confidence and min. detection confidence in order to tweak the module and obtain better results.
In this project tutorial we have explored the Realtime Human Pose Estimation using Mediapipe. This is a deep learning project reusable for any other movement detection project with recorded videos or live recording.
Get the project notebook from here
Thanks for reading the article!!!
Check out more project videos from the YouTube channel Hackers Realm


real person here. This has to be done in jupiterLab? If I type these instructions they probably won't work, but you skip a big step for the beginners here!